Learning how to resize picture for Instagram is truly an art, but more importantly, it’s a must for online performance and visual aesthetics.
Resizing reduces file sizes and speeds up loading times.
Smaller images consume less bandwidth, which is vital for mobile users. Resizing also ensures design consistency, preventing distorted visuals.
When you resize your image, you make it polished and appealing to your Instagram profile visitors.
Eager to master the art of resizing? You’re in for a treat.
Looking for more Followers?
- Real & Engaging Followers
- Maximize Conversions
- Time Saving & Safe
Image Dimension and Resolution 101

Before we dive deep into the topic of resizing Instagram images, let’s go over the basics.
We need to talk about pixels first.
A pixel is the smallest unit in a digital image, representing a single dot of color. Pixels combine to form pictures, and their quantity determines an image’s resolution and level of detail.
Moving on, let’s talk about DPI, which stands for “dots per inch.” DPI is a metric used to measure the resolution or quality of printed images. It represents the number of individual dots or pixels of ink or toner that a printer can deposit within a one-inch area.
A higher DPI value signifies greater detail and improved print quality.
The final term we need to get familiar with is resolution. Image resolution refers to the number of pixels, both horizontally and vertically, that make up a picture. It determines the image’s level of detail and clarity, with higher-resolution images containing more pixels and providing better quality and sharpness.
Now that you’re equipped with pixel and resolution knowledge, it’s time for the real deal.
Tools and Software for Resizing Images
There are multiple photo editing tools and software you can use to resize photos for Instagram. Here are some examples:
Free Online Tools
There are multiple free image resizer tools that you can use to easily resize and post photos on Instagram, such as websites you can access through your browser with a few clicks (e.g. Canva or Image Resizer).
Professional Software Options
If you want to take your photo resizing and editing in general to the next level, you can use some professional software options such as Adobe Photoshop or Lightroom.
Handy Mobile Apps for On-the-Go Resizing
You can also use apps on your mobile device as a resize image tool – for example, Adobe Lightroom phone app or Picsart.
Step-by-Step: How to Resize a Picture for Instagram

Resizing a picture for Instagram involves adjusting its dimensions to fit the platform’s recommended image sizes.
Here’s a step-by-step tutorial on how to easily resize images for Instagram using both online tools and mobile apps:
Using Canva
- Visit the App Store (iOS) or Google Play Store (Android) and download Canva. Launch the app.
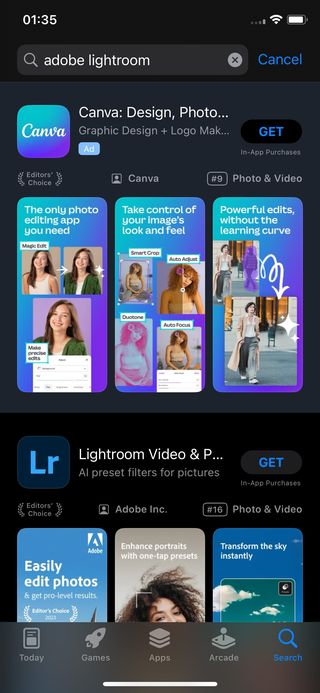
- Log into your Canva account or create a new one. Tap the “+” icon to import your picture into the app.
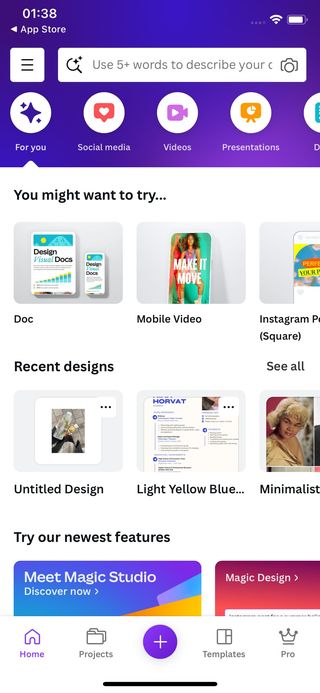
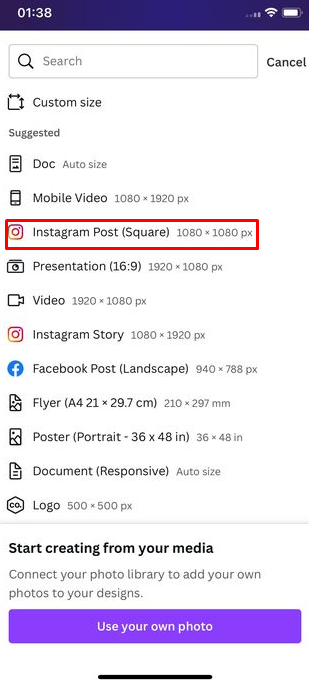
- Choose the ‘Instagram Post (Square) option.
- Again, tap the “+” icon to import your picture into the app.
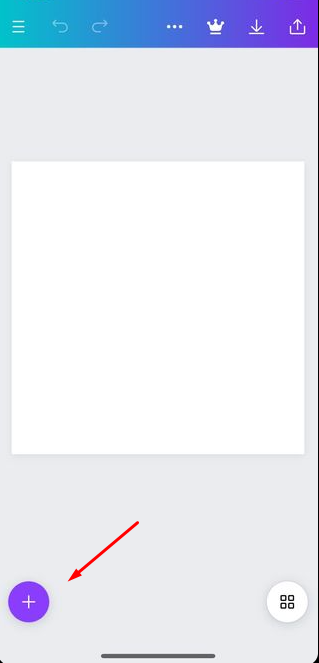
- Choose ‘Uploads.’
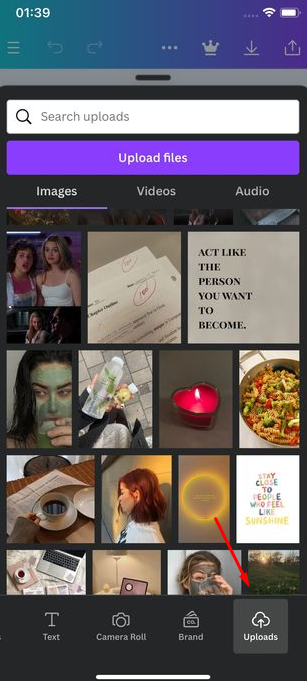
- Choose an Instagram post and adjust the image size.
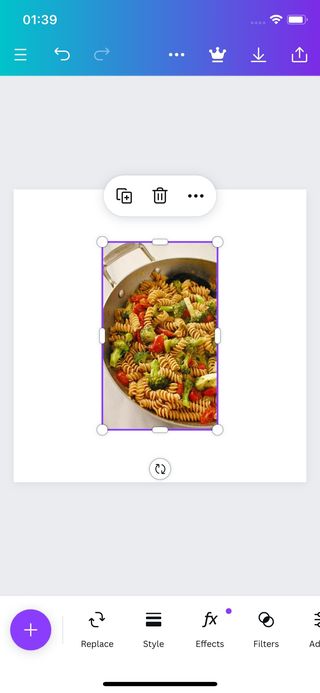
- Once you’re done – download your 1080 x 1080 photo size and share it with your Insta community.
And speaking of sharing your final image with your Insta community, let us at Flock Sociallend you a helping hand. We are the key to growing your followers and creating an engaging and genuine community.
Best Practices for Maintaining Image Quality

To maintain clarity and quality when resizing pictures, it’s crucial to follow some key tips.
Be sure to maintain the aspect ratio to prevent distortion, ensuring that the image’s proportions remain consistent. Additionally, choose the appropriate file format, such as JPEG for photographs and PNG for graphics, as these formats strike a balance between quality and file size.
When resizing, do so progressively in small increments to minimize the loss of important details.
Lastly, always preview and compare the resized image to the original to identify and rectify any quality issues before saving the final version. These practices will help ensure your resized images maintain their clarity and overall quality that you can then create content with, be it an Instagram story or a post.
Understanding Compression
Understanding compression in image resizing is vital, as it directly influences image quality and file size. Two primary types of compression exist: lossless and lossy. Lossless compression is an effective method for reducing the size of files while preserving the image quality, making it a viable choice for graphics and images with substantial text content.
On the other hand, lossy compression reduces file size by permanently discarding some image data, which can lead to quality loss, often acceptable for photographs. When resizing images, it’s crucial to consider compression settings carefully to avoid losing quality.
The Role of File Formats (JPEG, PNG, etc.)
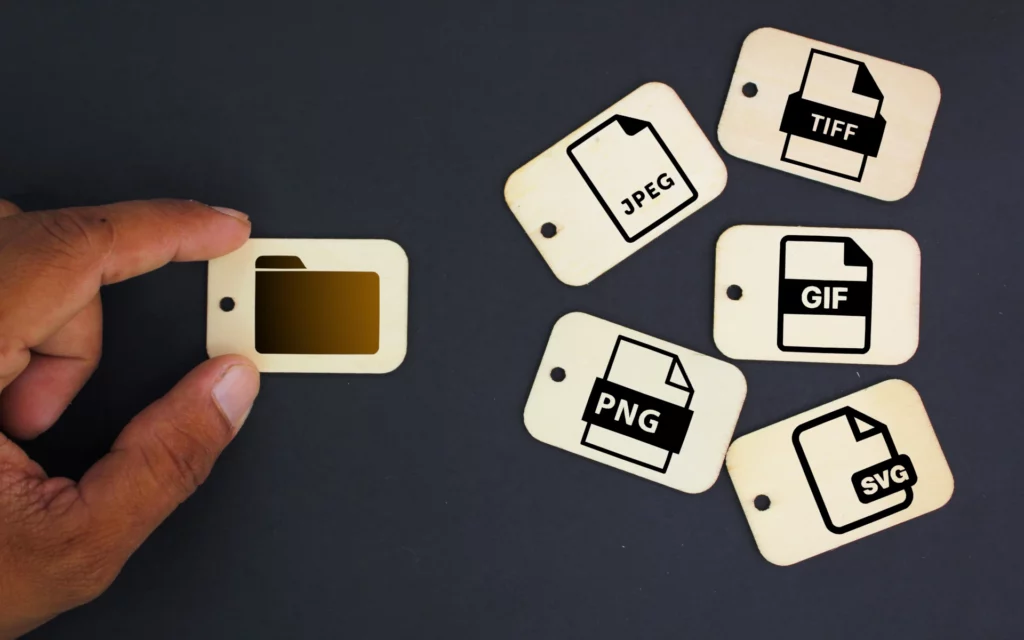
File formats play a significant role in image resizing, impacting both the quality and efficiency of the resizing process. Let’s dive into some of the format possibilities.
JPEG (Joint Photographic Experts Group) format is popular for photos due to high compression but beware of quality loss when resizing, especially multiple times or to a much smaller size.
PNG (Portable Network Graphics) is lossless, maintaining quality when resizing. Great for graphics, logos, and transparency, but may yield larger files than JPEG when resized.
GIF (Graphics Interchange Format) is commonly used for animations and simple graphics. When resizing GIFs, ensure that the animation frames and quality are maintained. Resizing might lead to a loss of frame timing or animation smoothness.
The choice of file format should align with the specific needs of your images and the intended use. JPEG is suitable for photos where some quality trade-off is acceptable, while PNG is better for graphics and images where preserving quality is paramount.
Benefits of Properly Sized Images on Instagram

Examining the impact of correct image sizing reveals its multifaceted benefits.
Firstly, it elevates the visual appeal of content, ensuring that images look polished and fit seamlessly within their intended context.
Secondly, it reduces load times, a critical factor for retaining user interest and enhancing website performance.
Quick-loading photos is crucial for mobile users, as they consume less data and cater to those with slower internet connections.
Furthermore, Instagram’s algorithm favors engaging content, and photos that load swiftly are more likely to reach a broader audience and feature prominently in users’ feeds. Additionally, proper sizing reduces bounce rates, retaining visitors who might otherwise leave due to slow loading.
Lastly, by striking the right balance between aesthetics and functionality, optimized sizing for Instagram posts captivates viewers, promoting commenting on posts and a more satisfying online experience.
Proper photo sizing is crucial for a polished look at your personal or business Instagram profile. Following the recommended dimensions ensures consistency, preventing distortion and cropping.
It preserves detail and color, enhancing visual impact and storytelling. Consistent sizing reinforces your brand and makes a big difference when attracting followers on your favorite social media platform.
Common Mistakes to Avoid While Resizing

Resizing Instagram photos can be tricky, with common quality pitfalls.
A major problem is losing quality due to over-compression or excessive resizing. To avoid this, keep your original image, use an editing tool with compression control, resize it once, and consider PNG for minimal loss.
Another challenge is aspect ratio distortion, which can occur when you resize an image without locking its aspect ratio. Always make sure to lock the aspect ratio to maintain the image’s original proportions.
Additionally, incorrect dimensions can lead to cropping or display problems.
Instagram has exact size requirements for different types of posts, so it’s essential to refer to Instagram’s official guidelines and resize your image accordingly. For example, when making a carousel Instagram post with multiple images, post square images, and when posting Instagram stories, opt for a vertical image.
Composition is also vital; resizing should consider the placement of the main subject or focal point to ensure it remains intact and properly positioned within the new dimensions.
Always preview your resized image on Instagram before posting to spot any potential issues with how it displays, giving you a chance to make adjustments if needed.
Lastly, begin with high-resolution source images for better quality when resizing. Test resized images on mobile devices to ensure compatibility with Instagram’s mobile interface.
The Final Verdict: The Art and Science of Resizing
In conclusion, learning how to resize picture for Instagram is essential for optimizing web performance and maintaining visual appeal among your online community. It reduces file sizes, enhances user experience, and ensures a professional appearance.
This guide has covered the basics of resizing your pitch-perfect posts, offering step-by-step tutorials for resizing using various tools in just a few clicks. The emphasis is on not losing quality through proper practices, aspect ratio preservation, and file format selection.
In a competitive social media landscape, finding the perfect size for photos can significantly boost your online success.
Oh, and before we sign off:
Unlock your Instagram potential and gain genuine followers effortlessly. Our tool is your solution. Begin your journey now with the help of Flock Social. Sign up now!


