


Have you ever uploaded a photo to Instagram only to find it cropped in all the wrong places? Maybe your friend’s face got cut off, or the beautiful sunset you captured lost its dramatic sky. This frustrating experience happens when your image dimensions don’t match what Instagram expects.
Learning how to resize picture for Instagram properly can transform your content from awkward and cropped to polished and professional. Whether you’re sharing vacation photos, promoting your business, or building a personal brand, getting your image sizes right makes a noticeable difference in how your content appears to followers.
The good news is that resizing images for Instagram doesn’t require expensive software or technical expertise. With the right knowledge and tools, anyone can prepare their photos for the platform in just a few minutes. This guide walks you through everything you need to know about Instagram image dimensions and the best methods to resize your pictures for any type of content.
Why Image Size Matters on Instagram
When you upload an image that doesn’t fit Instagram’s requirements, the platform automatically crops or compresses it. This automatic adjustment rarely produces the results you want. Important details get cut off, faces appear awkwardly positioned, and the overall composition suffers.
Properly sized images display exactly as you intended. Your carefully composed shots maintain their balance, and viewers see the complete picture without any unwanted cropping. This attention to detail helps you create a perfect Instagram profile that looks professional and intentional.
Beyond individual posts, consistent image sizing contributes to your overall aesthetic identity on the platform. When you scroll through a well-maintained Instagram feed, you’ll notice that the images flow together seamlessly. This visual harmony doesn’t happen by accident—it comes from understanding and applying proper image dimensions.
Image quality also affects how the Instagram algorithm treats your content. Blurry, pixelated, or poorly cropped images tend to receive less engagement because they simply don’t look appealing. When you take the time to resize picture for Instagram correctly, you’re giving your content the best chance to perform well.
Instagram Image Dimensions for Every Content Type
Instagram supports several different content formats, and each one has its own ideal dimensions. Understanding these specifications helps you prepare your images before uploading, ensuring they display perfectly every time.
Feed Posts
For standard feed posts, Instagram supports three main aspect ratios. Square posts work best at 1080 x 1080 pixels with a 1:1 aspect ratio. Portrait posts should be 1080 x 1350 pixels with a 4:5 aspect ratio, which is the tallest format allowed in the feed. Landscape posts display well at 1080 x 566 pixels with a 1.91:1 aspect ratio.
The portrait format (4:5) takes up the most screen space when users scroll through their feeds, making it a popular choice for maximizing visibility. However, the best format depends on your specific image and what you want to highlight.
Stories and Reels
Stories and Reels use the same vertical format designed for full-screen viewing. The ideal dimensions are 1080 x 1920 pixels with a 9:16 aspect ratio. This fills the entire smartphone screen and creates an immersive viewing experience.
Profile Pictures
Profile pictures display as circles on Instagram, so you need to account for the circular crop when preparing your image. The recommended size is 320 x 320 pixels, though uploading a larger square image (like 1080 x 1080) gives Instagram more data to work with. For more details on this topic, check out our guide on Instagram profile picture sizing.
Carousel Posts
Carousel posts can contain up to 10 images or videos. All items in a carousel must share the same aspect ratio, so decide on your format before creating the content. Most creators use either square (1:1) or portrait (4:5) for carousels.
File formats matter too. Instagram accepts JPEG and PNG files for images. JPEG works well for photographs, while PNG is better for graphics with text or transparent backgrounds.
How to Resize Pictures Using Free Online Tools
You don’t need to download any software to resize images for Instagram. Several free browser-based tools make the process quick and straightforward.
Canva
Canva offers preset Instagram dimensions that take the guesswork out of resizing. Simply create a new design, select the Instagram post or story template, and upload your image. You can then adjust the positioning and scale to fit the frame perfectly. The free version includes all the basic resizing features you need.
Adobe Express
Adobe Express provides similar functionality with a clean, intuitive interface. Choose your desired Instagram format, upload your photo, and use the crop and resize tools to adjust your image. The platform also offers basic editing features if you want to enhance your photo before downloading.
Pixlr
Pixlr is a more advanced option that feels similar to professional photo editing software. You can manually enter specific pixel dimensions or use the crop tool with preset aspect ratios. This gives you precise control over exactly how your image will appear.
Step-by-Step Process
Using any of these tools follows a similar workflow. First, open the tool and select your desired output dimensions or aspect ratio. Next, upload your original image. Then, position and scale your image within the frame, making sure important elements aren’t cut off. Finally, download the resized image in JPEG or PNG format.
These online tools help you make pictures fit on Instagram without awkward cropping or quality loss. The key is taking a few extra minutes to prepare your images before uploading them to the platform.
Resizing Images with Mobile Apps
Since most Instagram users post directly from their phones, mobile resizing apps offer a convenient solution. These apps let you prepare your images right on your device before uploading.
InShot
InShot is one of the most popular mobile editing apps for Instagram content. It includes preset canvas sizes for all Instagram formats and makes it easy to resize, crop, and add borders to your images. The app also handles video editing if you create Reels or Stories.
Snapseed
Snapseed, developed by Google, offers powerful editing tools along with cropping and resizing features. While it doesn’t have Instagram-specific presets, you can manually set aspect ratios and export at high quality. The app excels at enhancing image quality before you resize.
Photo Resizer
For straightforward resizing without extra features, dedicated resizer apps get the job done quickly. These apps let you enter exact pixel dimensions and batch process multiple images at once.
Square Fit
Square Fit and similar apps specialize in preparing images for Instagram’s square format. They add borders or backgrounds to non-square images, allowing you to post the full picture without cropping. This works especially well when you take perfect Instagram selfies and want to share the complete shot.
Mobile apps work well for quick edits and on-the-go posting. Keep one or two resizing apps on your phone so you’re always ready to prepare content for Instagram.
Using Desktop Software for Professional Results
When you need maximum control over image quality and precise adjustments, desktop software provides the most powerful options for resizing images.
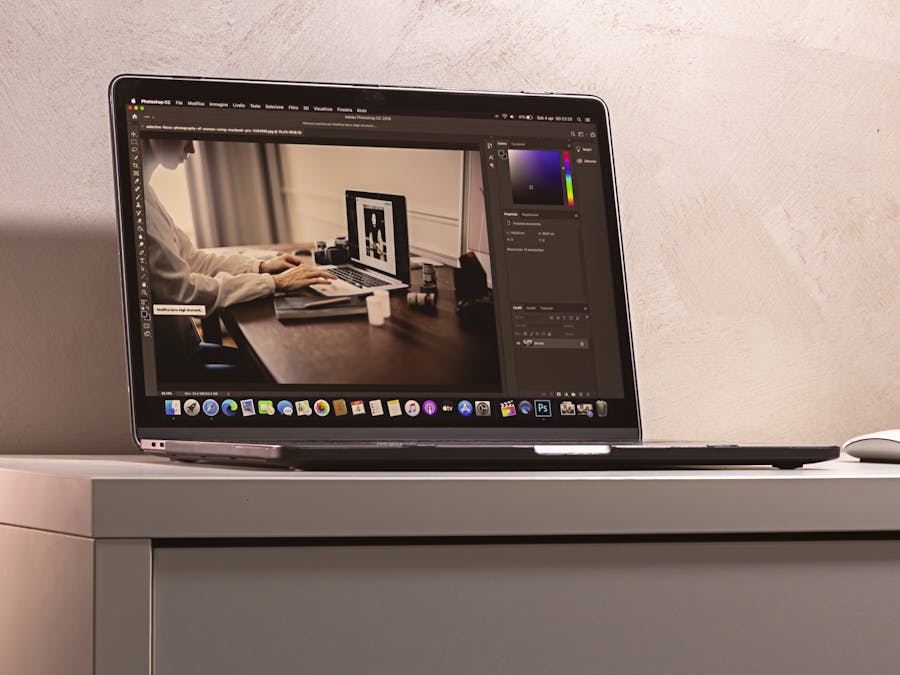
Adobe Photoshop
Photoshop remains the industry standard for image editing. To resize for Instagram, open your image and go to Image > Image Size. Enter your desired dimensions (like 1080 x 1350 for portrait posts) and choose the appropriate resampling method. Bicubic Sharper works well when reducing image size, while Bicubic Smoother is better for enlarging.
Adobe Lightroom
Lightroom excels at batch processing, making it ideal if you need to resize multiple images at once. Set up an export preset with your Instagram dimensions, and you can process dozens of images with a single click. This saves significant time when preparing content in advance.
GIMP
GIMP is a free, open-source alternative to Photoshop that includes all the resizing tools you need. Go to Image > Scale Image to change dimensions, or use the crop tool with specific aspect ratios. The learning curve is steeper than simpler tools, but GIMP offers professional-level control without any cost.
Preview (Mac) and Photos (Windows)
Even basic built-in applications can handle simple resizing tasks. On Mac, Preview lets you adjust image dimensions through Tools > Adjust Size. On Windows, the Photos app includes basic crop and resize functions. These options work well for quick adjustments when you don’t need advanced features.
Desktop software gives you the highest quality results because you’re working with the original file at full resolution. For important content or professional use, taking the extra time to resize on a computer is worth the effort.
How to Avoid Cropping and Show Full Pictures
Sometimes your image simply doesn’t fit Instagram’s aspect ratios, and you don’t want to crop any part of it. Several techniques let you display full pictures on Instagram without losing important elements.
Adding Borders
The most common solution is adding borders or padding around your image. If you have a wide landscape photo that you want to post as a square, add white (or colored) bars above and below the image. This creates a letterbox effect that preserves the entire original picture.
Many apps automate this process. InShot, Whitagram, and Square Fit all add borders automatically when you select your desired output format. You can choose border colors that complement your image or match your overall feed aesthetic.
Using Background Blur
Instead of solid color borders, some apps create a blurred version of your image as the background. This fills the extra space with colors and textures from your photo, creating a more cohesive look than plain borders. The effect works particularly well for portrait photos posted in square format.
Creative Framing
You can also use borders as a design element rather than just a necessity. Add decorative frames, patterns, or textures around your images. This turns the sizing limitation into a creative opportunity that makes your posts stand out.
Carousel Strategy
For panoramic images or very wide shots, consider splitting the image across multiple carousel slides. Users can swipe through to see the complete picture, and this format often generates higher engagement because it encourages interaction.
Tips for Maintaining Image Quality When Resizing
Resizing images incorrectly can result in blurry, pixelated, or distorted photos. Following these best practices helps preserve quality throughout the process.
Start with High-Resolution Originals
Always begin with the highest quality version of your image. Resizing down from a large file produces better results than trying to enlarge a small one. If you’re taking photos specifically for Instagram, shoot at your camera’s maximum resolution.
Avoid Multiple Compressions
Each time you save a JPEG file, it loses some quality due to compression. Try to resize your image in one step rather than making multiple adjustments and saving repeatedly. If you need to make several edits, work with PNG or the original file format until your final export.
Use Proper Resampling
When resizing in professional software, choose the appropriate resampling algorithm. Bicubic interpolation generally produces the smoothest results. Some programs offer specific options for reducing or enlarging images—use the one that matches your task.
Sharpen After Resizing
Resizing can sometimes soften images slightly. Applying a small amount of sharpening after you resize can restore crispness. Be careful not to over-sharpen, which creates an unnatural, harsh appearance.
Check Your Results
Before posting, zoom in on your resized image to check for quality issues. Look for blurriness, pixelation, or color banding. If something looks off, try resizing again with different settings or from a higher-quality original.
High-quality images help build a strong digital presence across social platforms. Taking the time to resize properly shows that you care about the content you share.
Creating a Consistent Visual Feed with Properly Sized Images
Your Instagram profile displays your posts in a grid format, and how these images look together matters as much as how they look individually. Consistent sizing plays a major role in creating an attractive, cohesive feed.
Choose Your Primary Format
Decide on a primary aspect ratio for your feed posts and stick with it most of the time. Many creators use portrait (4:5) exclusively because it maximizes screen space. Others prefer square (1:1) for its clean, uniform grid appearance. Mixing formats randomly creates a choppy, disorganized look.
Plan Your Grid
Before posting, preview how new images will look alongside your existing content. Several apps let you see a mock-up of your grid with planned posts. This helps you maintain visual flow and catch any sizing inconsistencies before they go live.
Maintain Consistent Editing
Beyond sizing, consistent editing style contributes to feed cohesion. Use similar filters, color tones, and brightness levels across your images. When combined with uniform sizing, this creates a professional, intentional appearance.
Learn from Successful Creators
Many successful creators follow a creator guide approach to maintain visual consistency across their content. Study feeds you admire and notice how they handle image sizing and composition. You’ll likely see patterns in their approach that you can adapt for your own content.
Properly sized images paired with thoughtful captions help you write engaging Instagram posts that resonate with your audience. The visual and written elements work together to create compelling content.
Planning and Scheduling Your Resized Content
Once you understand how to resize picture for Instagram, you can streamline your workflow by preparing content in batches. This approach saves time and helps you maintain a consistent posting schedule.
Batch Processing
Set aside time to resize multiple images at once rather than preparing each post individually. Desktop software like Lightroom makes this especially efficient with export presets. You can process a week’s worth of content in one sitting.
Organize Your Files
Create a folder system for your resized images. Separate them by content type (feed posts, Stories, Reels) and by status (ready to post, scheduled, posted). This organization makes it easy to find the right content when you need it.
Use Scheduling Tools
After preparing your resized images, you can schedule your Instagram posts in advance. Scheduling tools let you upload your content, write captions, and set posting times ahead of schedule. This ensures consistent publishing even when you’re busy with other tasks.
Maintain Your Rhythm
Having resized images ready to go helps you maintain optimal Instagram posting frequency without scrambling to create content at the last minute. When you batch your resizing work, you always have a library of prepared content waiting to be shared.
The combination of proper sizing, batch preparation, and scheduled posting creates an efficient content workflow. You spend less time on technical tasks and more time engaging with your audience and creating new content.
Mastering how to resize picture for Instagram might seem like a small detail, but it makes a significant difference in how your content appears. Properly sized images look more professional, display as intended, and contribute to a cohesive feed aesthetic. Whether you use free online tools, mobile apps, or professional desktop software, the key is taking a few extra minutes to prepare your images before posting. Your followers will notice the difference, and your content will have the best chance to make an impact.